Why Clean Fuel is the Lifeline of Your Marine Diesel Engine
Diesel engine filter replacement is a critical maintenance task for any vessel. Here’s a quick overview:
Quick Answer: How to Replace Your Diesel Fuel Filters
- Frequency: Every 200-300 hours or annually (whichever comes first)
- Filters to Change: Most marine diesels have two – a primary filter/water separator and a secondary engine-mounted filter
- Basic Steps: Drain, remove old filter, clean housing, install new filter with lubricated gaskets, bleed air from system
- Time Required: 30-60 minutes for both filters
- Critical: Always bleed the fuel system after replacement to prevent vapor lock
A sobering fact: 9 out of 10 diesel engine problems stem from contaminated fuel. Modern injectors have micron-level tolerances, meaning even microscopic dirt, water, or algae can cause catastrophic damage.
These breakdowns often happen miles from shore, but the good news is that most are preventable with regular filter changes.
Marine diesels face unique challenges. Salt air, humidity, and wave motion contribute to fuel contamination. Water condensation is especially common, creating the perfect environment for “diesel bug”—microbial growth that clogs systems.
Your fuel filters are the only barrier protecting expensive injectors and fuel pumps. Clogged filters starve the engine of clean fuel, leading to hard starting, power loss, rough idling, and eventual failure.
This guide covers the complete filter replacement process, from filter identification to bleeding the system. It provides the knowledge needed to keep your diesel running strong, whether you’re in Fort Lauderdale, Miami, or anywhere on the water.
Understanding Your Marine Diesel’s Fuel Filters
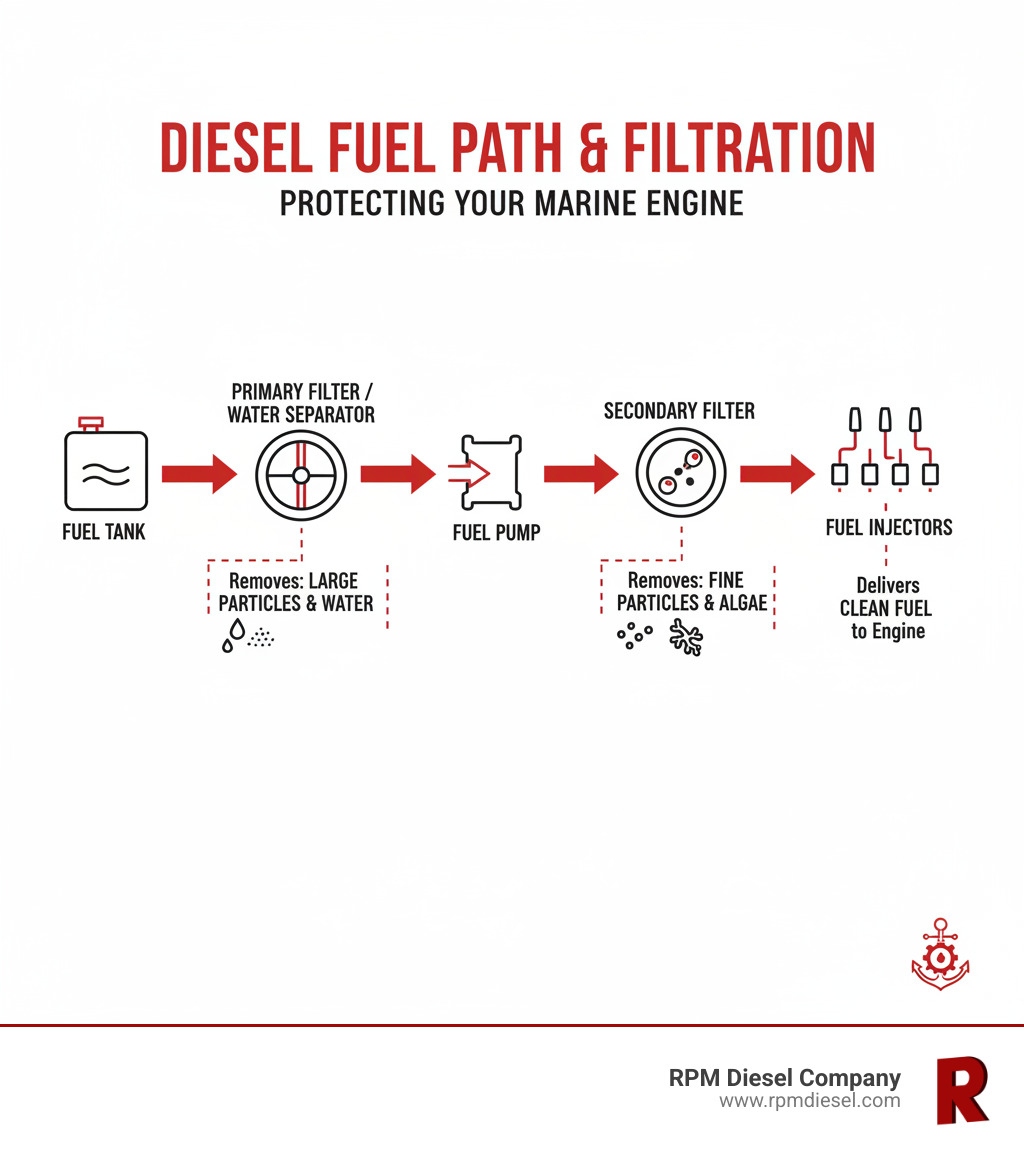
Most marine diesels use a two-stage filtration system to ensure fuel is perfectly clean. This system consists of a primary and a secondary filter, working in tandem to protect your engine.
Primary Fuel Filters and Water Separators
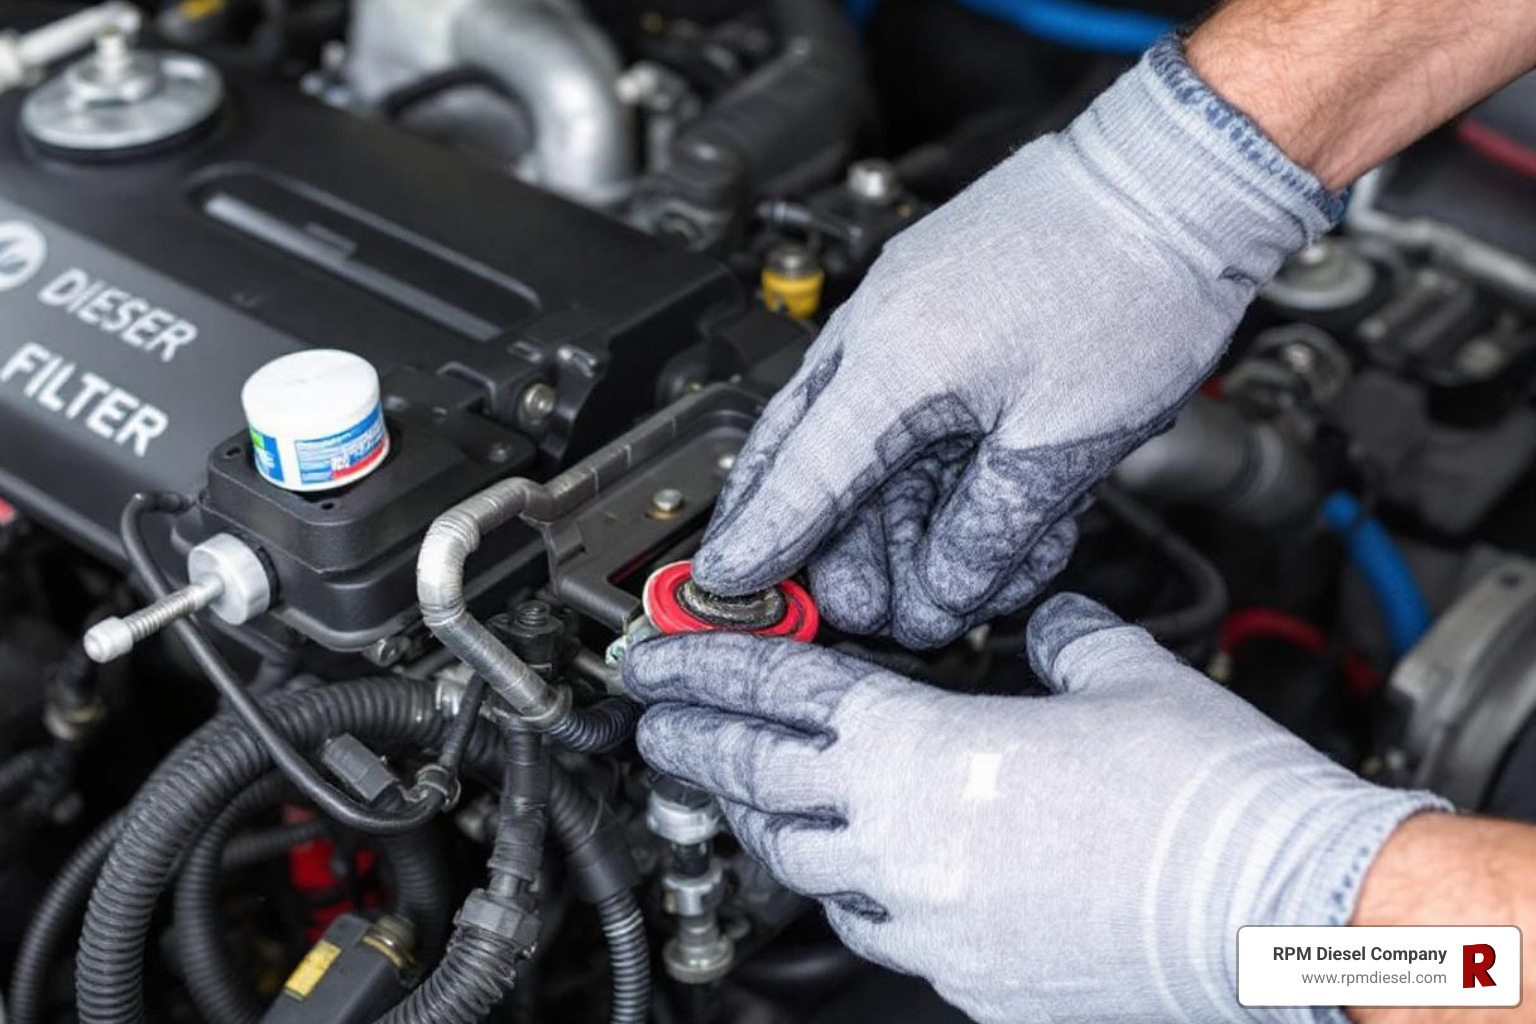
The primary filter, often a water separator, is the first line of defense. Located between the fuel tank and the engine, it removes larger contaminants (10 to 30 microns) and, crucially for marine environments, separates water from the fuel.
Water in fuel is a major issue, as condensation is common in marine fuel tanks and can lead to “diesel bug” (microbial growth). The primary filter often uses centrifugal action to separate water and debris into a collection bowl. Seeing algae and sediment, or water in fuel in the bowl indicates the filter is working but also signals a contamination problem that needs addressing to avoid the devastating effects of dirty fuel and costly repairs. These fuel contamination effects can be severe.
Secondary Fuel Filters
After the primary filter, fuel passes to the secondary filter, usually mounted on the engine. This filter is for fine-tuning, trapping smaller particles (typically 2.5 to 5 microns) before fuel enters the high-pressure injection system. Some have water-blocking membranes that can restrict flow if saturated.
The Critical Role of Micron Ratings
Understanding micron ratings is essential for effective diesel engine filter replacement. A micron is one-millionth of a meter (a human hair is ~70 microns), so these filters trap particles invisible to the naked eye. This particulate size comparison is key.
The micron rating indicates the size of particles a filter can capture. Choosing the correct rating is critical, especially for modern common-rail diesels. These engines operate at extremely high pressures with tight injector tolerances, where even microscopic debris can cause major damage, making their common-rail engine requirements very strict.
Many common-rail engines require a fine 2-micron filter as their secondary filter, while older engines might use a 10-micron filter. A 30-micron filter is often used as a primary. The golden rule is to always follow your engine’s manufacturer recommendations. The manual will specify the exact micron ratings needed for both filters, and matching filter to engine needs is key for engine health.
When to Replace Your Fuel Filters: Signs and Schedules
Your marine diesel will give you warning signs when filters need changing. Catching these signs early can prevent you from being stranded.
Signs Your Fuel Filter Needs Attention
- Difficulty starting is a primary clue. A clogged filter restricts fuel flow, making the engine struggle to fire up.
- Loss of power under load is another telltale sign. If the engine feels sluggish and can’t reach expected performance, a dirty filter is likely restricting fuel flow.
- Rough idling or engine stalling indicates an inconsistent fuel supply. Stalling after running for a short time is a classic sign of fuel starvation from a clogged filter.
- Excessive exhaust smoke can also point to filter issues. Black smoke may indicate poor combustion from contaminated fuel, while white smoke can suggest water in the fuel.
Key Factors Influencing Diesel Engine Filter Replacement Frequency
There is no single answer for diesel engine filter replacement frequency, but a good baseline from manufacturers is every 200 to 300 operating hours or annually, whichever comes first. Filters should be changed at least annually, even with low usage, as fuel degrades and water condensation can lead to microbial growth in sitting tanks.
Several factors can require more frequent changes:
- Fuel quality: If you notice excess water or debris in your primary filter bowl, especially in areas like South Florida, consider cutting your replacement interval in half.
- Humid climate: Humid climates like those in Fort Lauderdale and Miami accelerate the growth of “diesel bug,” which can clog filters rapidly. Regular inspections are critical in these environments.
- Vessel Age and Usage: Older vessels with aging fuel tanks often generate more sediment. Heavy use and extended periods of sitting both present challenges that can necessitate more frequent changes.
A detailed service log is invaluable. Track hours, change dates, and your findings (water, sediment, etc.) to establish a personalized maintenance schedule for your vessel. This log is crucial for diagnostics and planning.
The Complete Marine Diesel Engine Filter Replacement Process
Alright, fellow mariners! Performing a diesel engine filter replacement might sound like a big job, but with a bit of preparation and the right approach, it’s a totally manageable task for most boat owners. Think of it as a crucial health check-up for your engine – and one that gives you immense peace of mind out on the water. The key to a smooth, successful filter change? Prioritizing safety and keeping things sparkling clean!
Before you even think about grabbing a wrench, let’s make sure we’re playing it safe. First things first, always ensure your engine is completely off and can’t accidentally spring to life – safety first! If your fuel system has a fuel shut-off valve (seacock) on the tank, it’s a smart move to close it. This prevents any unwanted fuel draining or siphoning while you work, keeping spills to a minimum. You’re working with fuel, so good ventilation is super important to keep those fumes from building up. And trust us, a few oil-absorbent pads or old rags spread out underneath your filters will be your best friend – fuel spills are almost inevitable, and we want to catch every drop. Don’t forget your safety glasses to protect your eyes from splashes and some nitrile gloves to keep your hands clean and safe from diesel’s less-than-friendly chemicals. If you’re curious to dive deeper into how fuel filters generally work, you can find a helpful overview right here: A general overview of fuel filters.
Tools and Materials for a Marine Diesel Engine Filter Replacement
Having all your gear ready before you start is like having a perfectly coiled line – it just makes everything smoother. Here’s a look at the essential tools and materials you’ll want to have neatly laid out, just like in the picture below, before you tackle your marine diesel engine filter replacement.
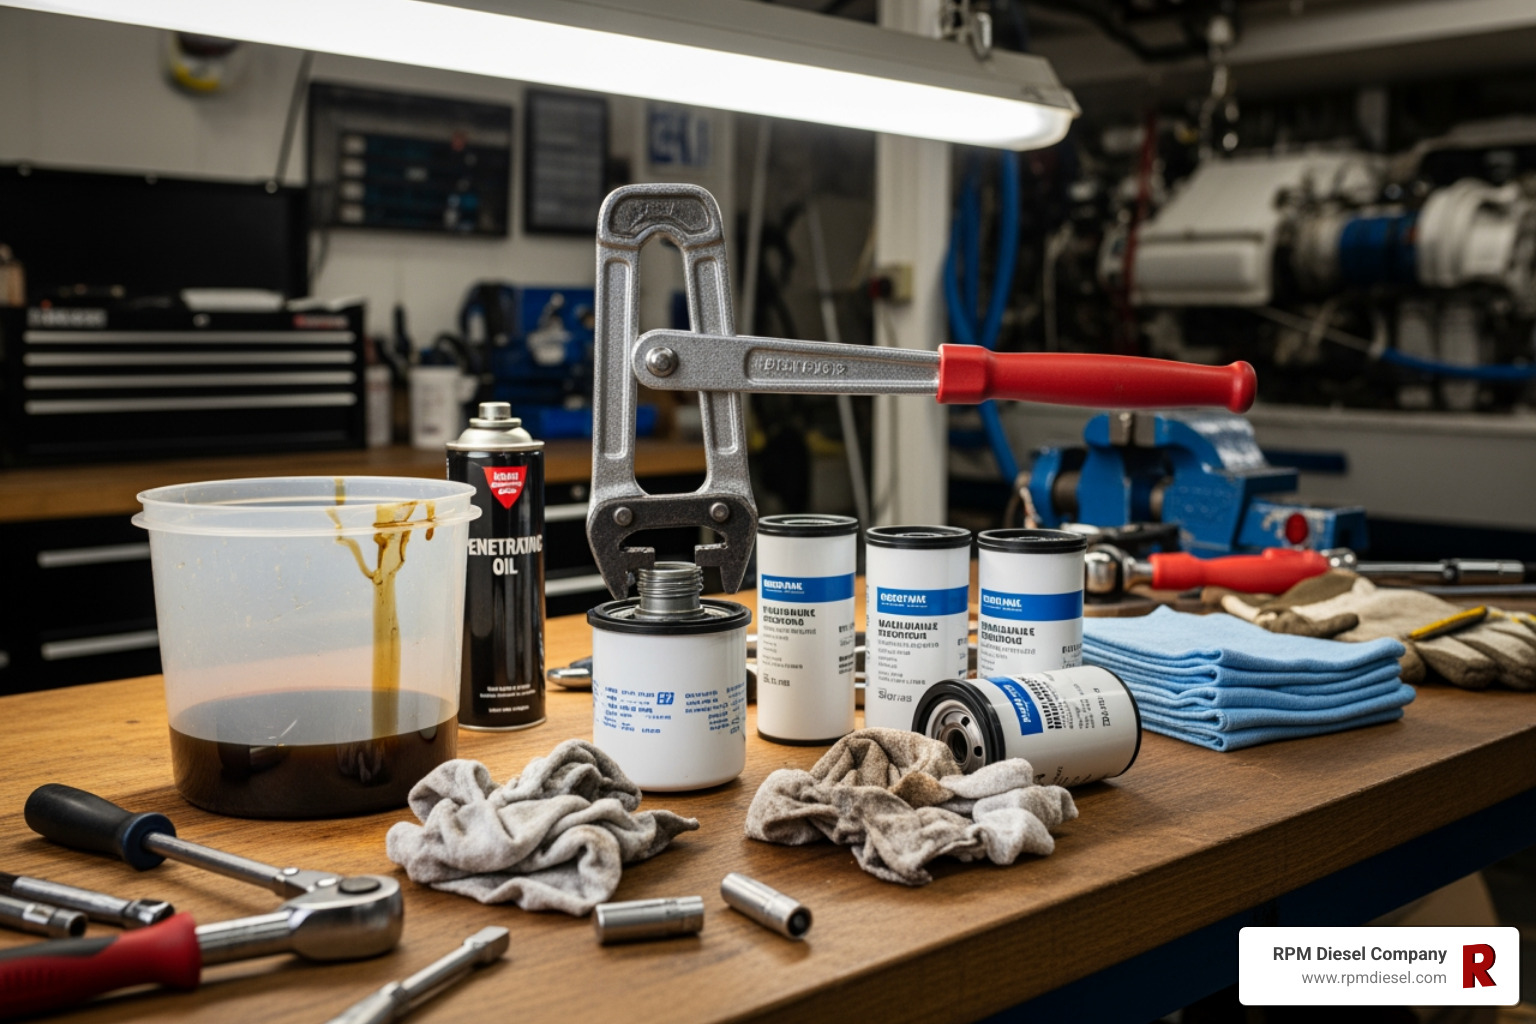
You’ll definitely need your new fuel filters themselves – both the primary and secondary, making absolutely sure they’re the correct ones for your specific engine and have the right micron ratings. Always double-check part numbers against your engine manual or the filters you’re replacing. A good filter wrench is a must-have; whether it’s a strap wrench, cap wrench, or a specialized marine filter wrench, make sure it fits your filters. Keep a stack of clean rags or paper towels handy for wiping up any drips and cleaning surfaces. A drain pan or bucket is essential to collect old fuel and water – a clear one is especially great for the primary filter so you can inspect what comes out. Crucially, don’t forget the new O-rings and gaskets that should come with your new filters; never, ever reuse old ones! A little bit of fresh, clean diesel fuel is needed for lubricating those new O-rings and for pre-filling spin-on filters. And, as we mentioned, safety glasses and nitrile gloves are non-negotiables for personal protection. A flat-head screwdriver or pry tool can be super handy for gently coaxing off stubborn old O-rings. Finally, while optional, a torque wrench is a fantastic addition if you want to ensure your filter housings are tightened precisely to the manufacturer’s specifications, preventing leaks from overtightening or undertightening.
Step-by-Step: Changing the Primary Filter & Water Separator
Now that you’re prepped and ready, let’s get down to changing that primary filter and water separator – often the first and most critical line of defense for your engine’s fuel system.
First, you’ll need to locate your primary filter. It’s usually found somewhere between your fuel tank and the engine, often in a pretty accessible spot in the engine room. Once you’ve found it, carefully position your drain pan directly underneath the filter assembly. Many primary filters have a little petcock or drain valve at the bottom of their clear collection bowl. Gently open this valve and let any accumulated water and fuel drain into your clear container. This is a great opportunity to inspect what comes out – if you see lots of water, algae, or debris, you know your filter has been working hard! Once it’s drained, close that valve.
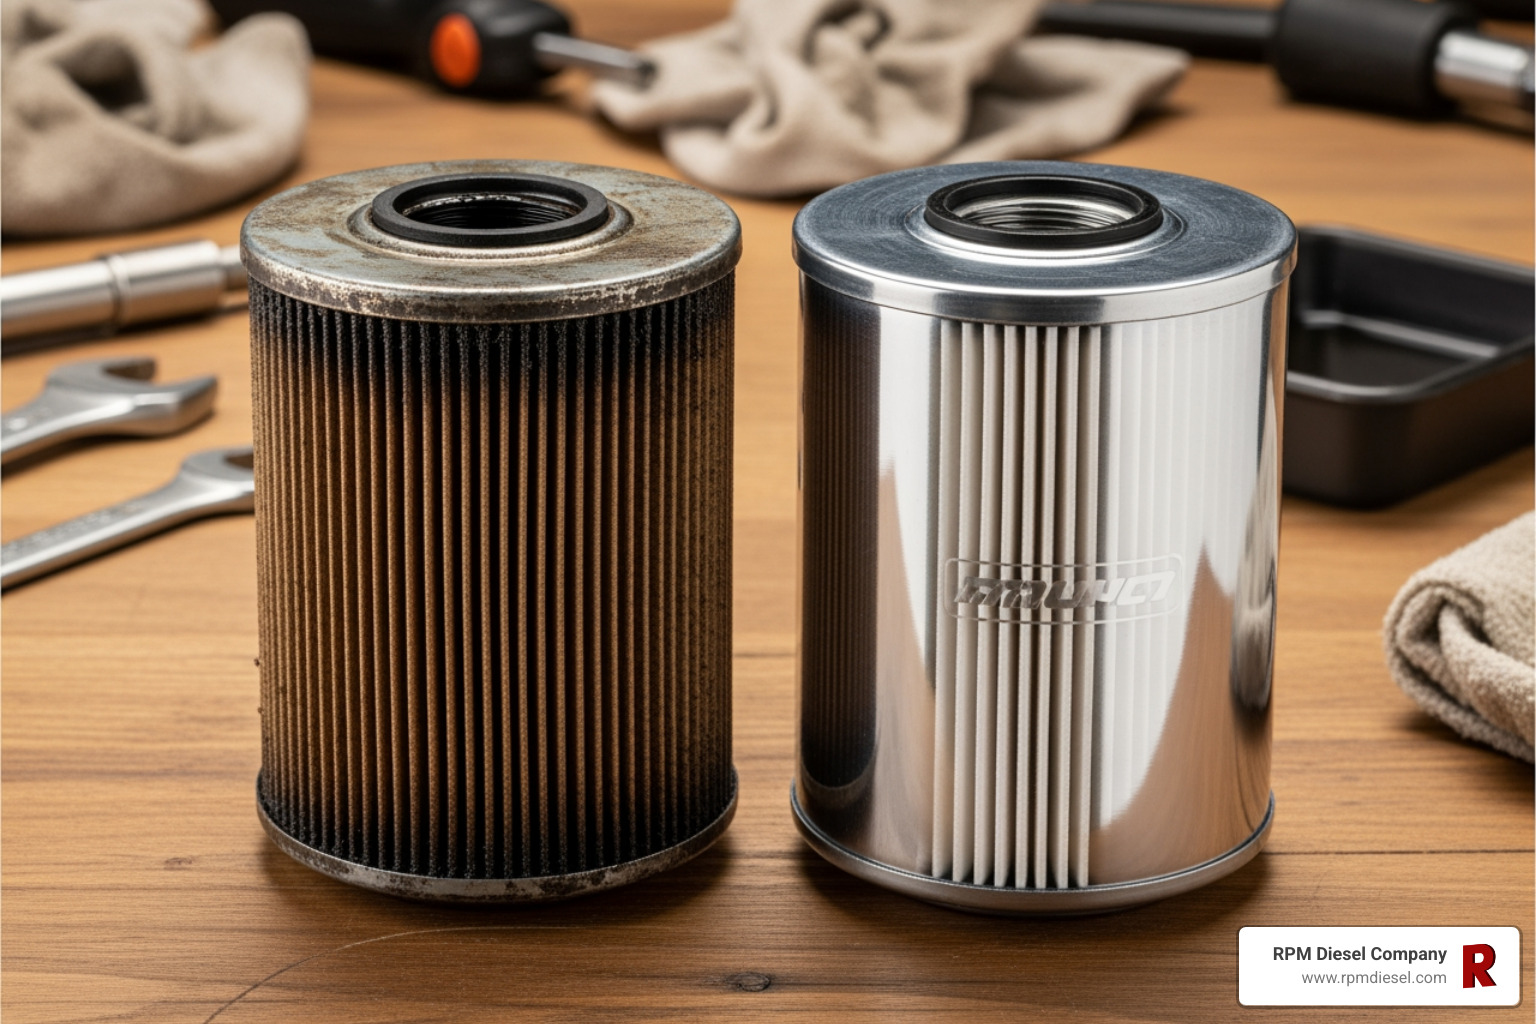
Next, it’s time to remove the old filter element. Depending on your specific filter type (some are cartridge-style, others are spin-on), you might need to unscrew a T-handle or a filter cap to get to the element, or simply unscrew the whole filter canister. Be careful as you lift out the old filter element and immediately pop it into a plastic zippered bag. This prevents any further messy drips. Just look at the difference between a dirty, old filter and a sparkling new one – it really highlights its job!
Now for the cleanup! Thoroughly wipe down the inside of the filter housing and that collection bowl with your clean rags. You want to get rid of any sediment, sludge, or stubborn algae. Make sure all the surfaces where seals will sit are spotless. Grab those new O-rings and gaskets that came with your filter. Lightly smear them with a little fresh, clean diesel fuel. This is a small but mighty step – it helps them slide into place smoothly, create a perfect seal, and prevents them from getting pinched or damaged during installation.
Finally, it’s time to install the new element. Carefully insert your pristine new filter element into the housing. If you have a spin-on type, a pro tip is to pre-fill it with clean diesel before spinning it on – this helps reduce the amount of air you introduce into the system, making bleeding easier later. If it’s a cartridge type, just make sure it’s seated correctly. Then, reassemble and hand-tighten everything. Screw on the filter cap or spin on the new canister until it’s snug. If your filter has a T-handle, tighten it by hand. The key here is to avoid overtightening, which can easily damage those new O-rings or the housing itself. We’re aiming for a firm, secure fit, not brute force!
Step-by-Step: Changing the Secondary (Engine-Mounted) Filter
Okay, one down, one to go! The secondary filter is usually a spin-on type and lives a bit closer to your engine, often right on the engine block or a nearby bracket. This is its last chance to polish up that fuel before it hits your engine’s delicate fuel injection system.
First, locate your secondary filter. Again, it’s typically mounted right on the engine or very close by. Before you start unscrewing, place those absorbent pads or rags underneath the filter. This is super important here, as you don’t want fuel dripping onto other sensitive engine components.
Now, grab your trusty filter wrench to loosen the old secondary filter. Be prepared – these can sometimes be quite tight! Once it’s loose, you can usually unscrew the rest of the old filter by hand. Have your sealed bag ready, because as you remove it, a small amount of fuel will inevitably spill out. Pop that old filter into the bag immediately.
With the old filter off, take a clean rag and thoroughly wipe the engine’s mounting surface where the filter seats. You want it completely free of any old gasket material, dirt, or debris. Grab the new O-ring gasket that came with your fresh secondary filter and apply a thin film of clean diesel fuel to it. This lubrication is crucial for a good seal.
Carefully thread the new filter onto the engine’s mounting stud. Take your time to make sure it’s not cross-threaded – that’s a headache you don’t want! Once it’s threaded on, spin the filter on by hand until the gasket just makes contact with the mounting surface. Then, give it an additional 1/2 to 3/4 of a turn by hand, or follow your manufacturer’s specific torque recommendations if you’re using a torque wrench. The goal is proper tightening – secure enough to seal, but not so tight that you damage the filter or its gasket. You’ve got this!
Post-Replacement Essentials: Bleeding and Disposal
After installing new filters, the final critical step in your diesel engine filter replacement is to bleed the fuel system to remove any trapped air, ensuring the engine starts and runs smoothly.
Importance of Removing Air
Diesel fuel systems are intolerant of air. Even small bubbles can cause vapor lock, starving the engine of fuel and causing it to stall. After a filter change, you must prime the fuel system to push fuel through and force out the air. This process also allows you to pressurize the system and perform a leak check before starting the engine.
How to Properly Bleed the Fuel System
Bleeding the fuel system is a critical step. Always consult your engine’s owner’s manual for the specific procedure, as it varies between engines.
The process generally involves locating bleed screws (small bolts on the filter housing or injection pump) and using the engine’s primer pump (manual lever or electric) to push fuel through the system.
A common bleeding procedure:
- Open the highest bleed screw in the system a turn or two.
- Operate the primer pump until you see a steady stream of pure, air-free fuel flowing out.
- Tighten the bleed screw while fuel is flowing to prevent air from re-entering.
- If your engine has other bleed screws, repeat the process, moving to the next highest one.
Once bled, start the engine. It may take a few extra seconds to fire. Immediately perform a final leak check around the new filters and connections. If you see any drips, tighten the connection. If a leak persists, shut down the engine immediately and investigate.
Environmental Considerations for Disposal
Proper disposal of old filters and used fuel is essential. They are considered hazardous waste and must be handled responsibly to protect the marine environment.
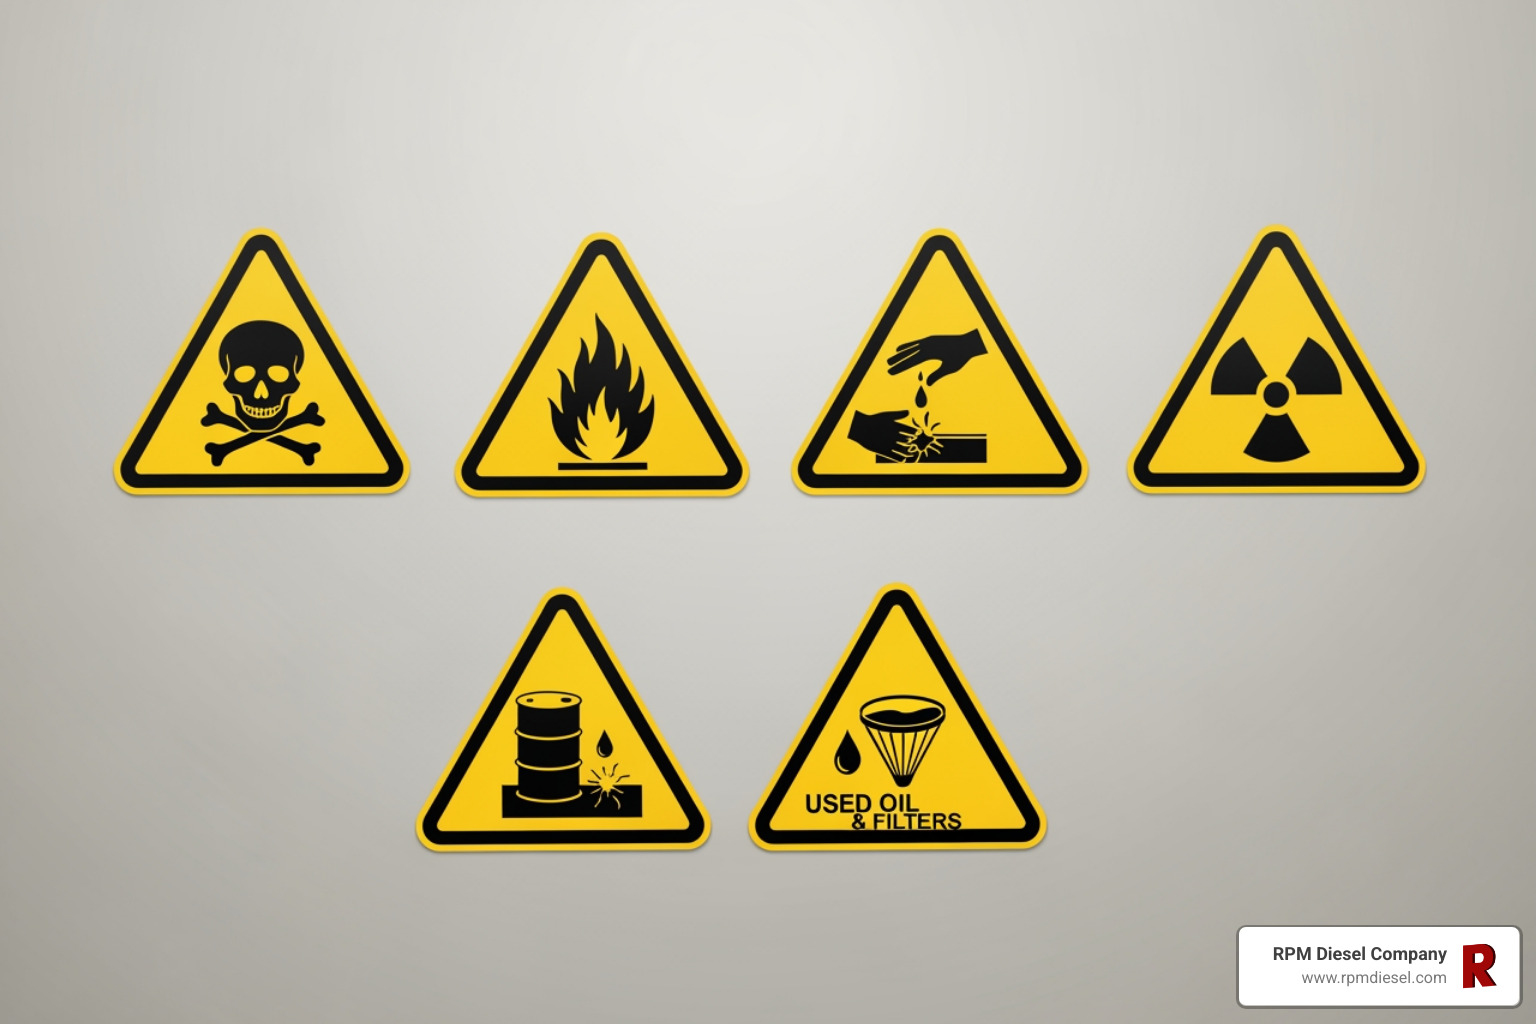
Used diesel engine filter replacement filters are soaked with fuel and contaminants and cannot go in regular trash. Many marine service centers or auto parts stores in areas like Fort Lauderdale or Miami accept them for recycling. Check with your local hazardous waste facility for specific rules.
Collect all drained fuel and water in a sealed, labeled container. This is also hazardous waste. Communities in Broward and Dade County have collection sites; check your local government website for details. Do not mix used fuel with used oil, as they are recycled differently.
Use proper containment: store used filters and fuel in clearly marked, leak-proof containers until you can transport them to a proper disposal facility. This small step helps protect our waterways.
Frequently Asked Questions about Marine Diesel Maintenance
Here are answers to some frequently asked questions about marine diesel maintenance, including issues that can arise after a diesel engine filter replacement.
What should I do if my engine won’t start after a filter change?
If your engine won’t start after a filter change, the most common cause is trapped air in the fuel system. Here are the steps to take:
- Re-bleed the system. Perform the bleeding procedure again, this time more thoroughly, to ensure all air is purged. It may take longer than you think.
- Check for leaks. A small air leak on the suction side can prevent the engine from starting. Inspect all new gaskets and O-rings to ensure they are seated correctly and not damaged.
- Verify the fuel valve is open. It’s a common mistake to forget to reopen the fuel shut-off valve after the job is done.
What do different exhaust smoke colors indicate?
Exhaust smoke color is a powerful diagnostic tool for your engine’s health.
- Black smoke: Indicates incomplete fuel combustion. Causes include engine overload, a restricted air intake, or injector problems.
- Blue smoke: Indicates the engine is burning oil, likely due to worn internal components like piston rings. This requires professional service.
- White smoke: Can be harmless steam on a cold start. However, persistent white smoke often means unburnt fuel or, more seriously, water in the combustion chamber from issues like a blown head gasket.
How often should a marine diesel engine be serviced?
Marine diesels operate in harsh environments and require systematic, regular attention to remain healthy.
- Daily Checks: Before each trip, perform a quick visual inspection. A common checklist is WOBBLES: Water, Oil, Belts, Bilges/Batteries, Leaks, Exhaust, Sound.
- Interval-Based Service: Follow your manufacturer’s schedule, but a general guide is:
- 100-200 Hours/Annually: Change engine oil and filter.
- 200-300 Hours/Annually: Perform diesel engine filter replacement (primary and secondary).
- 250 Hours/Annually: Replace seawater pump impeller.
- 500 Hours/Every 2 Years: Change coolant, check valve clearances.
- 1,000+ Hours: Have injectors and cooling systems professionally serviced.
- Annual Service is Key: Even with low hours, perform annual service. Time-based maintenance is as critical as hour-based, as fuel degrades, seals dry out, and corrosion occurs regardless of use.
In harsh conditions like South Florida’s heat and salt air, you may need to service your engine more frequently. Always follow the manufacturer’s schedule as a minimum and adjust based on your observations, which should be tracked in a detailed service log.
Conclusion
Think of diesel engine filter replacement as a small investment that pays enormous dividends. While not glamorous, this essential task protects thousands of dollars in precision fuel injection equipment from microscopic particles that can end your day on the water.
Most marine diesel breakdowns are preventable. Understanding your filtration system, watching for warning signs, and sticking to a maintenance schedule ensures engine reliability and peace of mind, letting you enjoy your time on the water.
Of course, there are times when you need a professional’s touch. Maybe you’ve finded a persistent problem during a filter change, or perhaps you just want the confidence that comes from having experienced eyes inspect your entire fuel system. That’s where having a trusted partner makes all the difference.
At RPM Diesel Company, we’ve been keeping marine diesels running strong throughout Fort Lauderdale, Miami, West Palm Beach, and far beyond. Whether you need comprehensive service, those impossible-to-find parts, or just some straight talk about what your engine really needs, we’re here for you. Our technicians have seen it all, and we’re authorized by the manufacturers who matter – Detroit Diesel, MTU, and more.
Your marine diesel deserves expert care. When you’re ready for service that goes beyond the basics, we’re ready to help.

